Published on by Michael Wong
Anyone starting an online business or selling products on the internet needs to learn the basics of building a SaaS(Software as a Service) application. In this guide, you’ll learn how to set up a basic payment system with Stripe, focusing on implementing checkout sessions and handling webhooks. Stripe has great guides using React, Next JS and HTML + Vanilla JS. I’m going to show you how to use Stripe in Elysia.
Prerequisites
To follow along this guide, you will need the following:
- Bun 1.1.26 or later
- A Stripe account
Optional
- Hurl 5.0.0 or later
Steps
- Create a new Elysia application
- Create a Hurl file
- Add Environment Variables
- Create a New Product
- Add Checkout Route
- Add Checkout Frontend
- Add the Stripe CLI
- Add Webhook Route
Create a new Elysia application
ElysiaJS is a modern web framework designed for building backend servers using TypeScript.
For this guide, I have created a Github repo that you can find the finished application.
Let’s start by creating a new Elysia application.
bun create elysia stripe-elysia
Once that’s done, you can move into the project directory and start the app:
cd stripe-elysia
bun run dev
Create a Hurl file
Hurl is a command line tool that runs HTTP requests defined in a simple plain text format.
In the root of the project, create a new Hurl file called stripe.hurl.
├── src
│   ├── index.ts
├── README.md
├── bun.lockb
├── package.json
├── stripe.hurl
└── tsconfig.json
# File: stripe.hurl

GET http://localhost:3000/
The statement above will send a request to the http://localhost:3000/ route.
- Run the Hurl file, make sure you Elysia app is running and run the following command in another terminal:
hurl stripe.hurl
You should see the following output:
Hello Elysia
Add Environment Variables
An .env file is used to store sensitive information like API keys, secrets and database credentials.
In the root of the project, create a new .env file.
# File: .env

STRIPE_PUBLISHABLE_KEY=pk_test_
STRIPE_SECRET_KEY=sk_test_
STRIPE_WEBHOOK_SECRET=whsec_
├── src
│   ├── index.ts
├── README.md
├── bun.lockb
├── .env
├── package.json
├── stripe.hurl
└── tsconfig.json
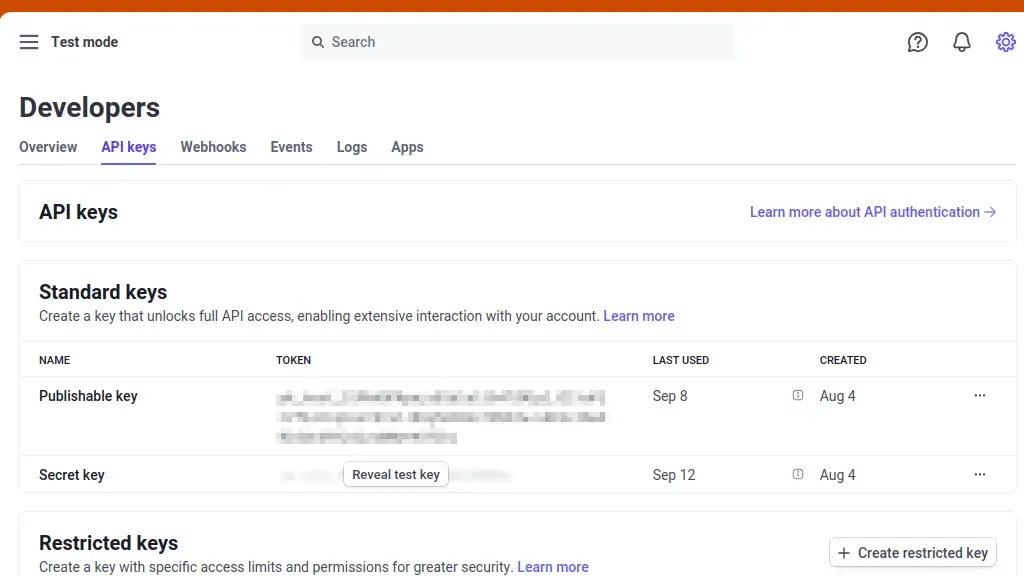
- Get the
PublishableandSecretkey from Stripe. We’ll get theWebhook Secretlater. - Add the STRIPE_PUBLISHABLE_KEY and STRIPE_SECRET_KEY to the
.envfile.
Create a New Product
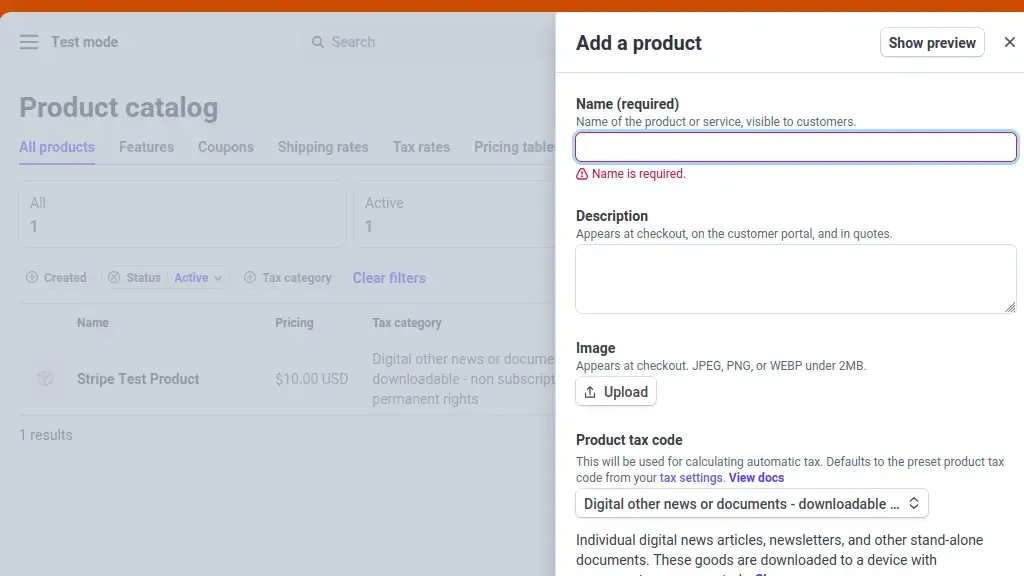
- Add a new product to Stripe.
- Make sure your are in Test Mode on stripe
- Make sure your product is
One-off
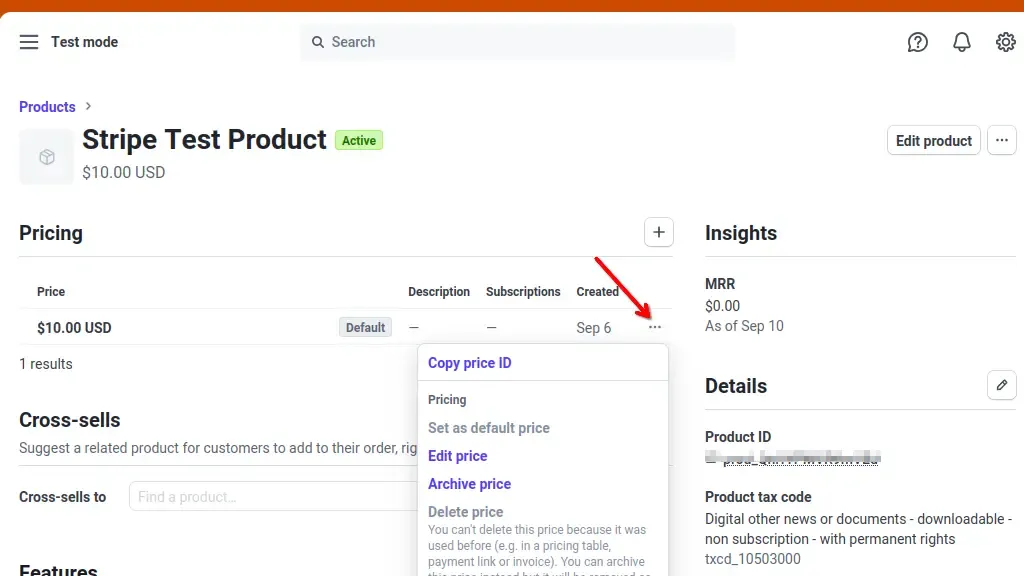
Make note of the price ID, we need it for the checkout route.
Add Checkout Route
First, let’s install the stripe package.
bun add stripe
Back to your project, let’s create a POST route to handle the checkout.
- The following code will create a new checkout session and return the
session URL- Update the line_items to match the price ID from you Stripe Dashboard
// index.ts

import { Elysia } from 'elysia'
import Stripe from 'stripe'

const stripe = new Stripe(process.env.STRIPE_SECRET_KEY as string, {
  apiVersion: '2024-06-20',
})

const app = new Elysia()
  .get('/', () => 'Hello Elysia')
  .post('/checkout', async () => {
    try {
      const session = await stripe.checkout.sessions.create({
        mode: 'payment',
        line_items: [
          {
            price: '<PRICE_ID>',
            quantity: 1,
          },
        ],
        payment_method_types: ['card'],
        success_url: 'http://localhost:3000/success',
        cancel_url: 'http://localhost:3000/cancel',
      })
      return { url: session.url }
    } catch (error) {
      console.log(error)
      throw new Error('Error in Stripe')
    }
  })
  .get('/success', () => 'Success')
  .get('/cancel', () => 'Cancelled')
  .listen(3000)

console.log(
  `🦊 Elysia is running at ${app.server?.hostname}:${app.server?.port}`,
)
- Update the
stripe.hurlfile
# File: stripe.hurl

POST http://localhost:3000/checkout
- Run the Hurl file, make sure you Elysia app is running and run the following command in another terminal:
hurl stripe.hurl
- You should see a URL output, copy the URL and paste it in your browser
{"url": https://checkout.stripe.com/c/pay/cs_test_...}
- You should see your Stripe checkout page
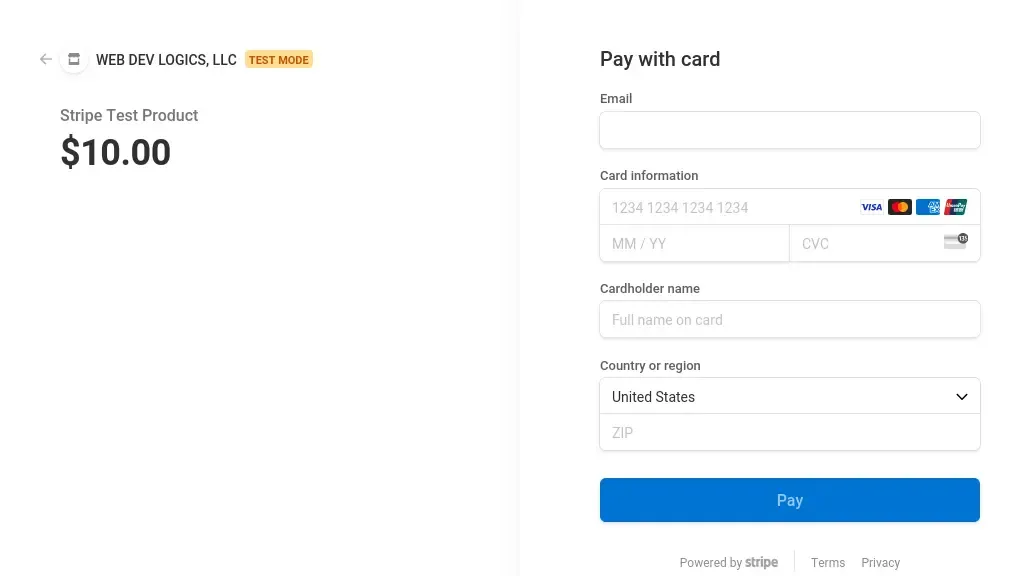
- Stripe provides Test Cards
- Use one of the cards and fill out the form, if successful, you’ll be redirected to the success page
Add Checkout Frontend
Elysia provides some plugins for working with html/jsx and using static files on the server. Install the plugins by running the following command at the root of the project:
bun add @elysiajs/html @elysiajs/static
To use JSX your file needs to end with affix “x”:
-
Update index.ts -> index.tsx
-
Register the Typescript type, append the following to tsconfig.json
// tsconfig.json
{
  "compilerOptions": {
    "jsx": "react",
    "jsxFactory": "Html.createElement",
    "jsxFragmentFactory": "Html.Fragment"
  }
}
- Create a new file called
public/checkout-button.ts- This following code adds an event listener to the
checkoutButton - Change the line_items to match the price ID from you Stripe Dashboard
- This following code adds an event listener to the
// public/checkout-button.ts

const checkoutButton = document.getElementById('checkoutButton')
checkoutButton?.addEventListener('click', async () => {
  const response = await fetch('/checkout', {
    method: 'POST',
    headers: {
      'Content-Type': 'application/json',
    },
  })
  const { url } = await response.json()
  window.location = url
})
Update index.tsx
- To the ’/’ route, we add a button that will trigger the ‘/checkout’ route
// index.tsx

import { Elysia } from "elysia";
import { html, Html } from "@elysiajs/html";
import { staticPlugin } from "@elysiajs/static";
import Stripe from "stripe";

const stripe = new Stripe(process.env.STRIPE_SECRET_KEY!, {
  apiVersion: "2024-06-20",
});

const app = new Elysia()
  .use(staticPlugin())
  .use(html())
  .get('/', () => (
    <html lang='en'>
      <title>Checkout</title>
      <script src='https://js.stripe.com/v3/'></script>
      <body>
        <h1>Checkout</h1>
        <button id='checkoutButton'>Checkout</button>
        <script src='/public/checkout-button.ts'></script>
      </body>
    </html>
  ))
  .post('/checkout', async () => {
    try {
      const session = await stripe.checkout.sessions.create({
        mode: 'payment',
        line_items: [
          {
            price: '<PRICE_ID>',
            quantity: 1,
          },
        ],
        payment_method_types: ['card'],
        success_url: 'http://localhost:3000/success',
        cancel_url: 'http://localhost:3000/cancel',
      });
      return { url: session.url };
    } catch (error) {
      console.log(error);
      throw new Error('Error in Stripe');
    }
  })
.get('/success', () => 'Success')
.get('/cancel', () => 'Cancel')
.listen(3000);

console.log(
  `🦊 Elysia is running at ${app.server?.hostname}:${app.server?.port}`,
);
Add the Stripe CLI
- Install the Stripe CLI
- Log in to the CLI
stripe login
-
Complete the login process
-
Stripe listen
- In the terminal, run the following command
stripe listen -e checkout.session.completed --forward-to localhost:3000/webhook
- Copy the webhook signing secret from the terminal and add it to the .env file
Add Webhook Route
- append the POST route to index.tsx
- this route will listen to events in your Stripe account on your webhook endpoint so your integration can automatically trigger reactions.
// index.tsx
.post("/webhook", async ({ set, request }) => {
const rawBody = await request.text();
const signature = request.headers.get("stripe-signature");
let event;
try {
event = await stripe.webhooks.constructEventAsync(
rawBody,
signature!,
process.env.STRIPE_WEBHOOK_SECRET!,
);
} catch (err) {
console.log(`❌ Error message: ${err}`);
set.status = 400;
throw new Error(`Webhook Error: ${err}`);
}
switch (event.type) {
case "checkout.session.completed": {
const session = event.data.object;
console.log("💰 Payment received!", session);
break;
}
// case statements for other event types
default:
console.log(`🤷♀️ Unhandled event type: ${event.type}`);
}
set.status = 200;
return "success";
})
- Make sure your stripe terminal is open and listening for the webhook events
stripe listen -e checkout.session.completed --forward-to localhost:3000/webhook
- Start your project
bun run dev
- Fill out the checkout form
- In your webhook terminal, you should see logs from the events that were triggered by the webhook
Congratulations! You have successfully integrated Stripe into your Elysia app.
Written by Michael Wong
← Back to blog